There’s a lot of excitement about the Learning Management System, Google Classroom, currently with new features appearing almost weekly. This is the first in a series of posts about this amazing application.
Are you a Google Apps school? Only accounts that are associated with Google Apps for Education are able to utilize Google Classroom. Here are some first steps in the process
1. Log in
Assuming you are a GAFE (Google Apps for Education) and you are logged in to your account go to http://classroom.google.com to start your login and setup process.
2. Get started
Click on the + sign of the opening page of classroom
3. Create a class
You’ll be prompted to create a class. It’s a simple as that
4. Choose a theme
Once in you’ll land on a preset theme as the header of your classroom with an option to choose another theme or pattern from the Gallery – you can even upload your own photo for the theme.
If you have uploaded a photo of yourself to your Google account it will appear here f you select a pattern.
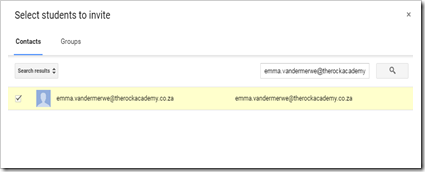
5. Invite your students to join Classroom
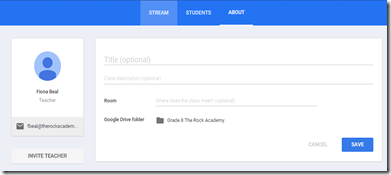
6. Complete your ‘About’ page
It also has a link to the Google Drive folder that is automatically created for each course to house resources.
7. Add your students
You can either give them the code that has automatically been generated to join with or you can invite them by email. If selecting the code option which is more suitable for bigger classes the students would just need to go to http://classroom.google.com and sign in, then click the ‘+’ icon and click Join Class.
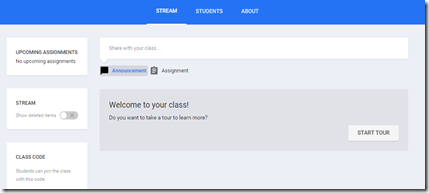
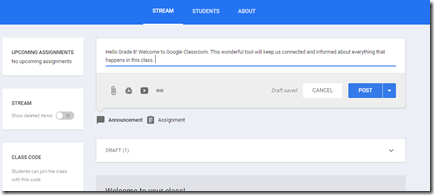
8. Add an announcement
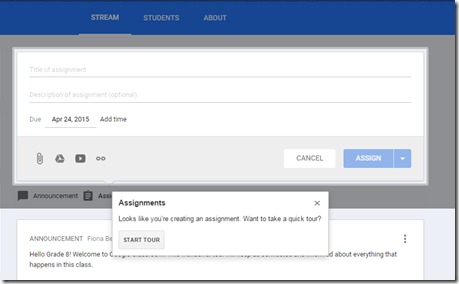
Go back to your stream and either add an announcement or an assignment.
If selecting an assignment you can upload an attachment, insert a Google Drive document, add a video from YouTube or insert a link. Once yiu have completed your information click on POST.
You will see your announcement as your class sees it.
9. Add an assignment
If you are adding an assignment click on ‘Add an assignment’ and follow the links. Fill in all the required details and even watch the tour if this is your first time round! The tour takes you into the process step-by-step.
10. Review what you have just learned
To watch a video on this process take a look at Amy Mayer’s video entitled ‘Getting Started with Google Classroom’ found at: https://www.youtube.com/watch?v=NIfXzJMLsMQ
In the next post on Google Classroom we’ll add how to manage, grade and review the assignments that are returned to you.


